


Pencil Sketching – The Value of Using a Grid & The “Shoe Frenzy”
I love to teach Drawing. Especially pencil drawing. All those gorgeous values, transitions and edges moving around in the composition at the same time. It’s pure art magic. It’s also the quickest way to grab your art students’ attention and keep it for the rest of the semester. Once they discover that they can draw – and draw really well – you have captured their attention. Not only that, you’ve secured an engaged classroom full of kids who want to know and learn more.
I have spent 13 years designing and redesigning my scaffolded teaching approach. I can tell you with all certainty, it works. Teachers contact me on the regular and tell me how invested their kids are how much better the work is. If you want proof, just hop over to my TpT shop and read the curriculum reviews. There are 1,000 plus…a thousand people can’t be wrong, right?
The Blessing
Seeing confidence emerge and take root in new artists is a privilege.
When people learn they can draw, they light up from the inside out.
If you’ve been to my blog party before, you know I stand firm on the foundation of a scaffolded approach to teaching. Be it drawing or painting, kids need time to not only learn a skill. They need ample time to hone that skill.
Little steps. Big victories.
As an artist and an educator, I found myself at times shying away from using a grid, but the truth of the matter is simple. For beginners – and even for advanced students drawing complex imagery – the grid is a fabulous way to walk students into the world of scaling objects up (or down).
I mean let’s face it, if it’s good enough for the legendary Chuck Close…who am I to deny its value?
Every time I consider a new lesson, an art project, or a concept – I ask myself, “What do I want the kids to learn?”
Once I determine the “What” – then I determine the “How.”
For my Beginner Drawing students, I start the pencil drawing journey with a Line Drawing Unit. We focus on developing a “critical eye,” considering angles and details with intent scrutiny. I like to say it’s “doing sit-ups for your eyes.” We are strengthening our artist’s eye. The end game is life drawing. So we need to begin early on “seeing” objects in a new and deliberate way.
This line drawing unit covers scaling objects up using a 4-part Quadrant Method. We start small, usually a worksheet with a 3 x 4 inch drawing. Then we move on to another small practice prior to the final project (8 x 10 inches). During these first practice drawings we focus on using that grid as a guide. The grid interacts with the image. The lines in the grids directly relate to the points in the reference. If we consider those relationships and line things up using the grid, the drawing will be perfectly proportional to the reference.
For the final project, students divide their reference image (a complex animated image – they choose from a set provided in the lesson) into four equal parts. Then they divide the drawing area into 4 equal parts. Each quadrant gets scaled up in direct proportion to the reference image. I stress the fact that the drawing area – the picture plane – must be directly proportional to the reference image or the finished drawing will be skewed and out of proportion.
Side note: This is a common mistake new artists make, as they will often insert grid lines onto an image on their phone (rectangular image). Then try to scale up to a picture plane that is square – when there is not enough room to scale and things get “squashed” and skewed, it is because the rectangle and the square are not proportional to one another.
Another common mistake is using a rectangular reference photo with a horizontal configuration and turning the drawing paper vertically. This will cause the drawing to be way too wide and not fit into the quadrants correctly. Fortunately, this error is usually seen with the placement of the first few lines, and easily corrected with a turn of the paper.
Once students are successful with the Quadrant Method, I move through the Shape Method of Drawing , Negative Space, then we explore visually communicating Form through the use of Value with graphite pencil.
I’m going to skip over the Shape and Negative Space lessons in today’s blog post, as I want you to see how one of my all-time favorite graphite pencil lessons comes to life beautifully using the Quadrant Method.
Behold the birth of the “Shoe Frenzy”
Years ago I was looking for subject matter for kids to draw – that I didn’t have to go out and purchase – and one day for an “on the fly” warm up activity (we’ve all been there – I probably had a headache) I told everyone to take off one shoe and stack the shoes in the middle of the table for a contour line exercise. We had tables of 4, so you may have to adjust if you do this depending on seating.
As the kids drew I noticed they were really into the exercise – very engaged and very focused.
The Process
Later in the semester, when I got to my pencil drawing Value Unit, I thought I would revisit the shoes. I put the kids in groups of 4 and they took close up photos of the piles of shoes. I even told them a day ahead about the photo shoot so they could wear their most interesting pair.
We took the shoes outside and photographed them – no fancy photo set up, no special lighting – just a piece of 18×24 inch drawing paper with a pile of shoes on it. The only stipulations were the image had to be clear and crisp (no blurry photos), and they had to get close so that at least 3 sides of the picture plane were broken – basically an open composition. I also told them to make sure there were no lost dark shapes because in a pencil drawing they would appear like a big black hole. Other than that, they could do whatever they wanted.
It can be a little bit of a chaotic challenge to get the photos printed, but here’s how we did it.
The kids choose their two to three (no more) favorite pics and they come to me and we choose the best one. Yes, there are 30 plus kids coming at me with, “Which one do I use, Ms. Fox???” and yes, it’s chaotic. I tell them at the beginning of class that we have two goals for the day – one, take a photo and two, choose a photo, both by the end of class. We have 90 minute blocks, so there is ample time. For a period schedule I would spread this over two class periods.
When photo choice is complete, they airdrop or email the photo to me, I rename it with their name (do this right away – those shoe pics all look the same after about the 3rd one lol) and I start a document for the images. As I drop the images into the document, I resize them to 4×5 inches. Some slight cropping may be necessary, but not much. The drawing picture plane will be 8×10 inches, so the proportions will be correct when the students layout the contour line drawing using the Quadrant Method. It will be exactly twice the size of the reference image.
I try my best to have all the images sized and in the reference document by the next class period. This can be one of those “gotta get done at home” things, and sometimes it doesn’t happen till the next day. Because my students do a practice value drawing prior to the final project (Radiant Ribbons or Curly Paper), they are on their last day of this assignment, so if I need a day to finish getting the shoe images together, it works out fine.
In between the Quadrant Method and this Shoe Frenzy lesson, students have learned how to build an object with shapes, how to build an object using only Negative Space, and how to create a form out of a shape by adding Value. The foundation has been set for a challenging realistic drawing that requires strict observation, sound skills, and rock solid confidence.
Because I am an advocate for community in the art classroom, we have a “No one left behind” aura in the space. I build this mindset by sometimes walking the kids through the set up of a project as a group. Not always, but sometimes.
The day I have the printed 4×5 inch photos ready – as I crop them I type each student’s name below the pic ( pro-tip: they won’t remember which one is theirs and neither will you lol). I cut them out, spread them out on the table, and have everyone pick theirs up on the way into class. There are rulers and paper cut to 10 x 12 inches on each table before the kids come in.
Side Note:
Students have already done this exact set up at the beginning of the semester when they did the final project for Quadrant Drawing – so this should go very smoothly, but I’ve explained it in full detail in case you have not done the line drawing prior
I stand up in front with a piece of 10 x 12 inch drawing paper and I explain that we will be doing this together. Everyone gets their paper, their pencil, their ruler and we go through these steps:
- Draw a one inch border all the way around the edge of your paper
- Behold the “I can’t read a ruler” mutiny…it’s coming…
- Easiest way to do this is have them measure in one inch from the edge in two places on each side of the paper (near each corner) and make a small mark – each side will have two small marks
- Line up the marks and draw your line – this will create a border
- This will create an 8 x 10 inch picture plane on the 10 x 12 inch drawing paper
- Next, divide the picture plane into four equal parts by measuring over to the 5 inch spot on the long side of the paper and making a mark (do this on both sides) and the 4 inch spot on the short end of the paper
- Line up these marks and draw a SUPER light “crosshair” on the drawing paper. This will get erased once the values begin to be added.
On the reference photo, kids can either measure over half way on each side and draw a crosshair (I tell them to make this one dark so they can see it) or they can fold the photo into four equal parts (make sure the parts are equal – pro-tip: have them cut the white border off the reference photo before they fold it) and then draw their crosshair.
Now it’s time to rock and roll.
Shoe Frenzy Steps: (pun intended)
- Contour Line Pencil Drawing (LIGHT)
- Check and recheck contour line to make sure everything is in proportion.
- Create a Value Scale in graphite pencil – use to check values during drawing process
- Begin laying in values.
- Work light to dark. You can always ADD value. Erasing to decrease values leaves a smudgy slimy area. This can abraid the paper and leave a “fuzzy” area that cannot be corrected.
- Focus on Value edges with a critical eye – are they soft or crisp? This will help to visually communicate the proper textures.
- Keep a piece of blank paper under the heel of your drawing hand. This helps to not smudge the graphite and blur the drawing.
- When blending graphite pencil, we do not use fingers or blending stumps in my room. All value is added via the pencil only for a nice, clean overall finish.
- Work slowly. Nothing fabulous ever happened by rushing. I like to say, “We’re not running from a fire.”
- Keep your drawing unwrinkled and clean throughout the process. Aim for good craftsmanship always. Your work is an extension of YOU. It should be handled with the utmost care and compassion, just like you.
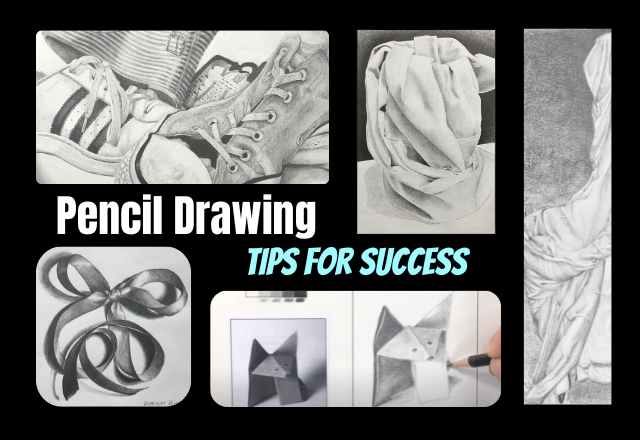
Below are some examples of the pencil drawing process from my Drawing 1 students:


“Shoe Frenzy” Slideshow below – all from Beginner Drawing – several pieces are students with accommodations (my other motto: “Success for Everyone” :D)
Timeline for final project is approximately 7-8 classes (90 min. block schedule) – Supplies: 80 lb. Blick Sulphite Drawing paper, Prismacolor Turquoise drawing pencil 2B & 4B only, Pentel® cap erasers, rulers


The long and the short of it is this…set the bar high. The images above are from students who were grades 10-12, more than half of whom were not “art kids.” Just your regular everyday students who got stuck in Drawing 1, because it was the only class that would fit their schedule.
Scaffolding skills works. I have seen the success for all students over the past 13 years, and it is the real deal. For more info on the details of the scaffold, check out the other blog posts on this page, there are a few that speak to scaffolding for both drawing and painting for all skill levels.
Be Among the First to Know
Please join my email list for “The Weekly Fabulousness” Newsletter. You’ll get new and updated product info, sales alerts and Art Educator PD Workshop Dates. Email subscribers get first dibs on seats!
Not sure you’re interested in being on the list?
Check out my teaching style with a FREE Mini-Workshop!
Each one comes complete with classroom resources. Take all six!
Choose from these FREE workshop topics:
- Colored Pencil Basics
- Colored Pencil Skin Tones
- How to Draw the Human Eye
- Art Task Cards – Drawing on a Grid
- How to Draw Ice Cream
- Acrylic Painting Basics
***NEW FREE DRAWING WEBINAR on YouTube!***
“Teaching Drawing Using a Scaffolded Approach” – You do NOT want to miss this! The philosophy and the actual scaffold, explained in full detail down to each and every drawing exercise and why this teaching strategy works.
Have a wonderful and safe year and Happy Teaching!
Tiff 🙂
pencil sketching
drawing tips
drawing technique


Share This Post