Exploring the Elements of Art: Spotlight on Abstraction and Choice
Kids love to color – believe it or not, high school students love coloring. Never assume they are too old. At the end of the day, they are just really tall first graders. With all the daily pressures, the therapeutic act of a colorful school drawing helps to release some stress.
I’m here to show you a cost-effective and easy way to incorporate the elements of art into your skill building school drawing lessons.
What are Elements of Art – The “Ah-ha!” Moment
One of my favorite activities as a kid was to scribble wavy intersecting lines on a piece of paper and fill the shapes with color. Markers, colored pencils and computer paper gave us all we needed for timeless creativity. That was 40 years ago, and I’m still using this school drawing fun today.
This is one of the simplest art activities with the highest level of student engagement. Once we incorporate learning into the process and kids are familiar with the seven Elements of Art, they see this activity in a whole new light. Without knowing it, they were already implementing the Elements of Art as they filled the page. Line, color and shape come together effortlessly in an original piece of art. It’s an “Ah-ha!” moment for sure!
Incorporating artistic choice without the pressure of realism or even representation is refreshing and engaging for students of all skill levels. When teaching Art Elements Line, Shape and Space, I find it extremely effective to offer choice through abstraction.
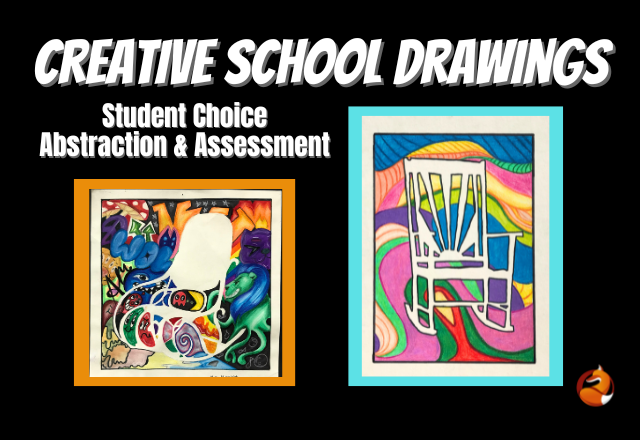
Abstraction, Student Choice and Creativity Enhance Skill Building
In this blog post, we will focus on teaching the Art Element Space – specifically Negative Space. The space in between and around objects. When kids learn to use this skill building technique to maintain scale and proportion, their drawing skills skyrocket!
The actual school drawing exercises are not that exciting and quite honestly, drawing using negative space is extremely challenging, especially at the beginning. I found the most successful student engagement took place when I offered the choice of adding abstract designs in the negative space.
As an example, in the Negative Space Chair Project students create 4×6 inch drawings of chairs, rocking chairs, and plants (more choice – choice increases engagement). These drawings are then enhanced with students adding designs – representational or abstract or both – to the space around the subject. The sky’s the limit when it comes to design choice. Stripes, polka dots, zentangles, etc. The only medium I would avoid is paint, as construction paper is not made for water media. It will literally disintegrate and this will make everyone sad – lol.
Fun fact: I had a student in my Art 1 class in 2016 who had an affinity for creating the most beautiful patterns for this project. Offhandedly, I told her she had a future as a pattern designer. We laughed. She just recently accepted a position with Kohl’s as a Surface Designer – specifically working with fabrics. How cool is that???
Pro-Tip: Keep all those neon and otherwise weird construction paper colors for this project. Cut the paper in half – the 4×6 inch drawing goes in the center. The finished pieces are much more dynamic and you have put this paper to good use. Unexpected Bonus: kids can’t trace!
Get Lesson Details Here: Negative Space Chair Drawing Lesson
Assessing School Drawings Is EASY with Project-Specific Rubrics
Because the size of this project is small, printing the rubric on a half sheet and taping it to the back before students begin makes grading a breeze. No more, “I lost my rubric!” and no more printing and cutting rubrics in order to grade. If you want to grade as the school drawings come in, the rubric is already on the back, and you are ready to go!
Pro-Tip #2: Review the project rubric as a class. I have gone so far as to have students write the expectations in a blank version of the rubric. This approach leads to ZERO students asking the one question that challenges our patience to new heights, “What are we supposed to be doing?”
Smaller School Drawings Bring Unexpected Victories
Early in my career, I was in a very small classroom. When I began to display in-progress work on the daily (on the white board and on my walls) I had to reduce the size of the work. Necessity breeds invention, and in this case it bred increased student engagement.
Kids not only finished stronger, the “burn out” and disengagement I had experienced with students on larger projects disappeared. With the daily display we began to see increased effort and community. Students encouraged each others’ progress. They worked harder and smiled more. I highly recommend it. It’s a glorious thing to behold.
For student work examples and more project inspiration, check out and follow my Instagram @mrstfoxresources
Have you used the Negative Space Chair Project in your art classroom? If so, I would love to know your experience and how the student choice portion of the assignment added student engagement. Feel free to reach out and share the fabulousness – details on my Contact Page!